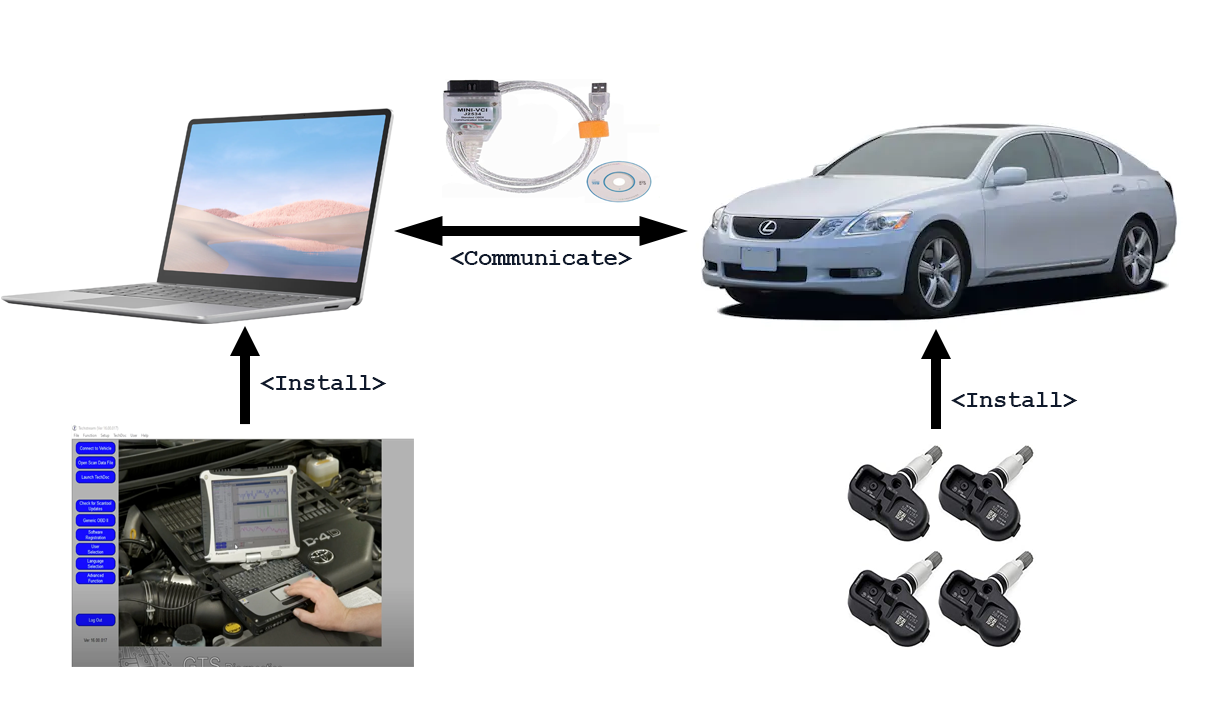
TPMS Programming
I recently went through the process of purchasing, installing, and reprogramming new TPMS-sensors on my 2008 Lexus GS300. This guide will take you through the steps required to perform this activity, which will be very similiar regardless if you are the owner of a Lexus, Toyota or other brand utilising this kind of sensor technology. Differences for other car manufacturers will translate to type of sensors and type of software to program these sensors.
What you will need:
-
TPMS Sensors
433MHz for EU market
315MHz for US market
I used part number: 42607-50010
Cost: 65 USD from Amazon.com (set of 4 pieces)
-
Mini VCI Cable
Necessary in order to connect a PC to the vehicle
I used a V16.00.017 J2534 cable
Cost: 34 USD from AliExpress.com
-
Techstream Software
Necessary in order to program the sensors for the vehicle
I used version 16.00.017.
Cost: 0 USD, can be found online
-
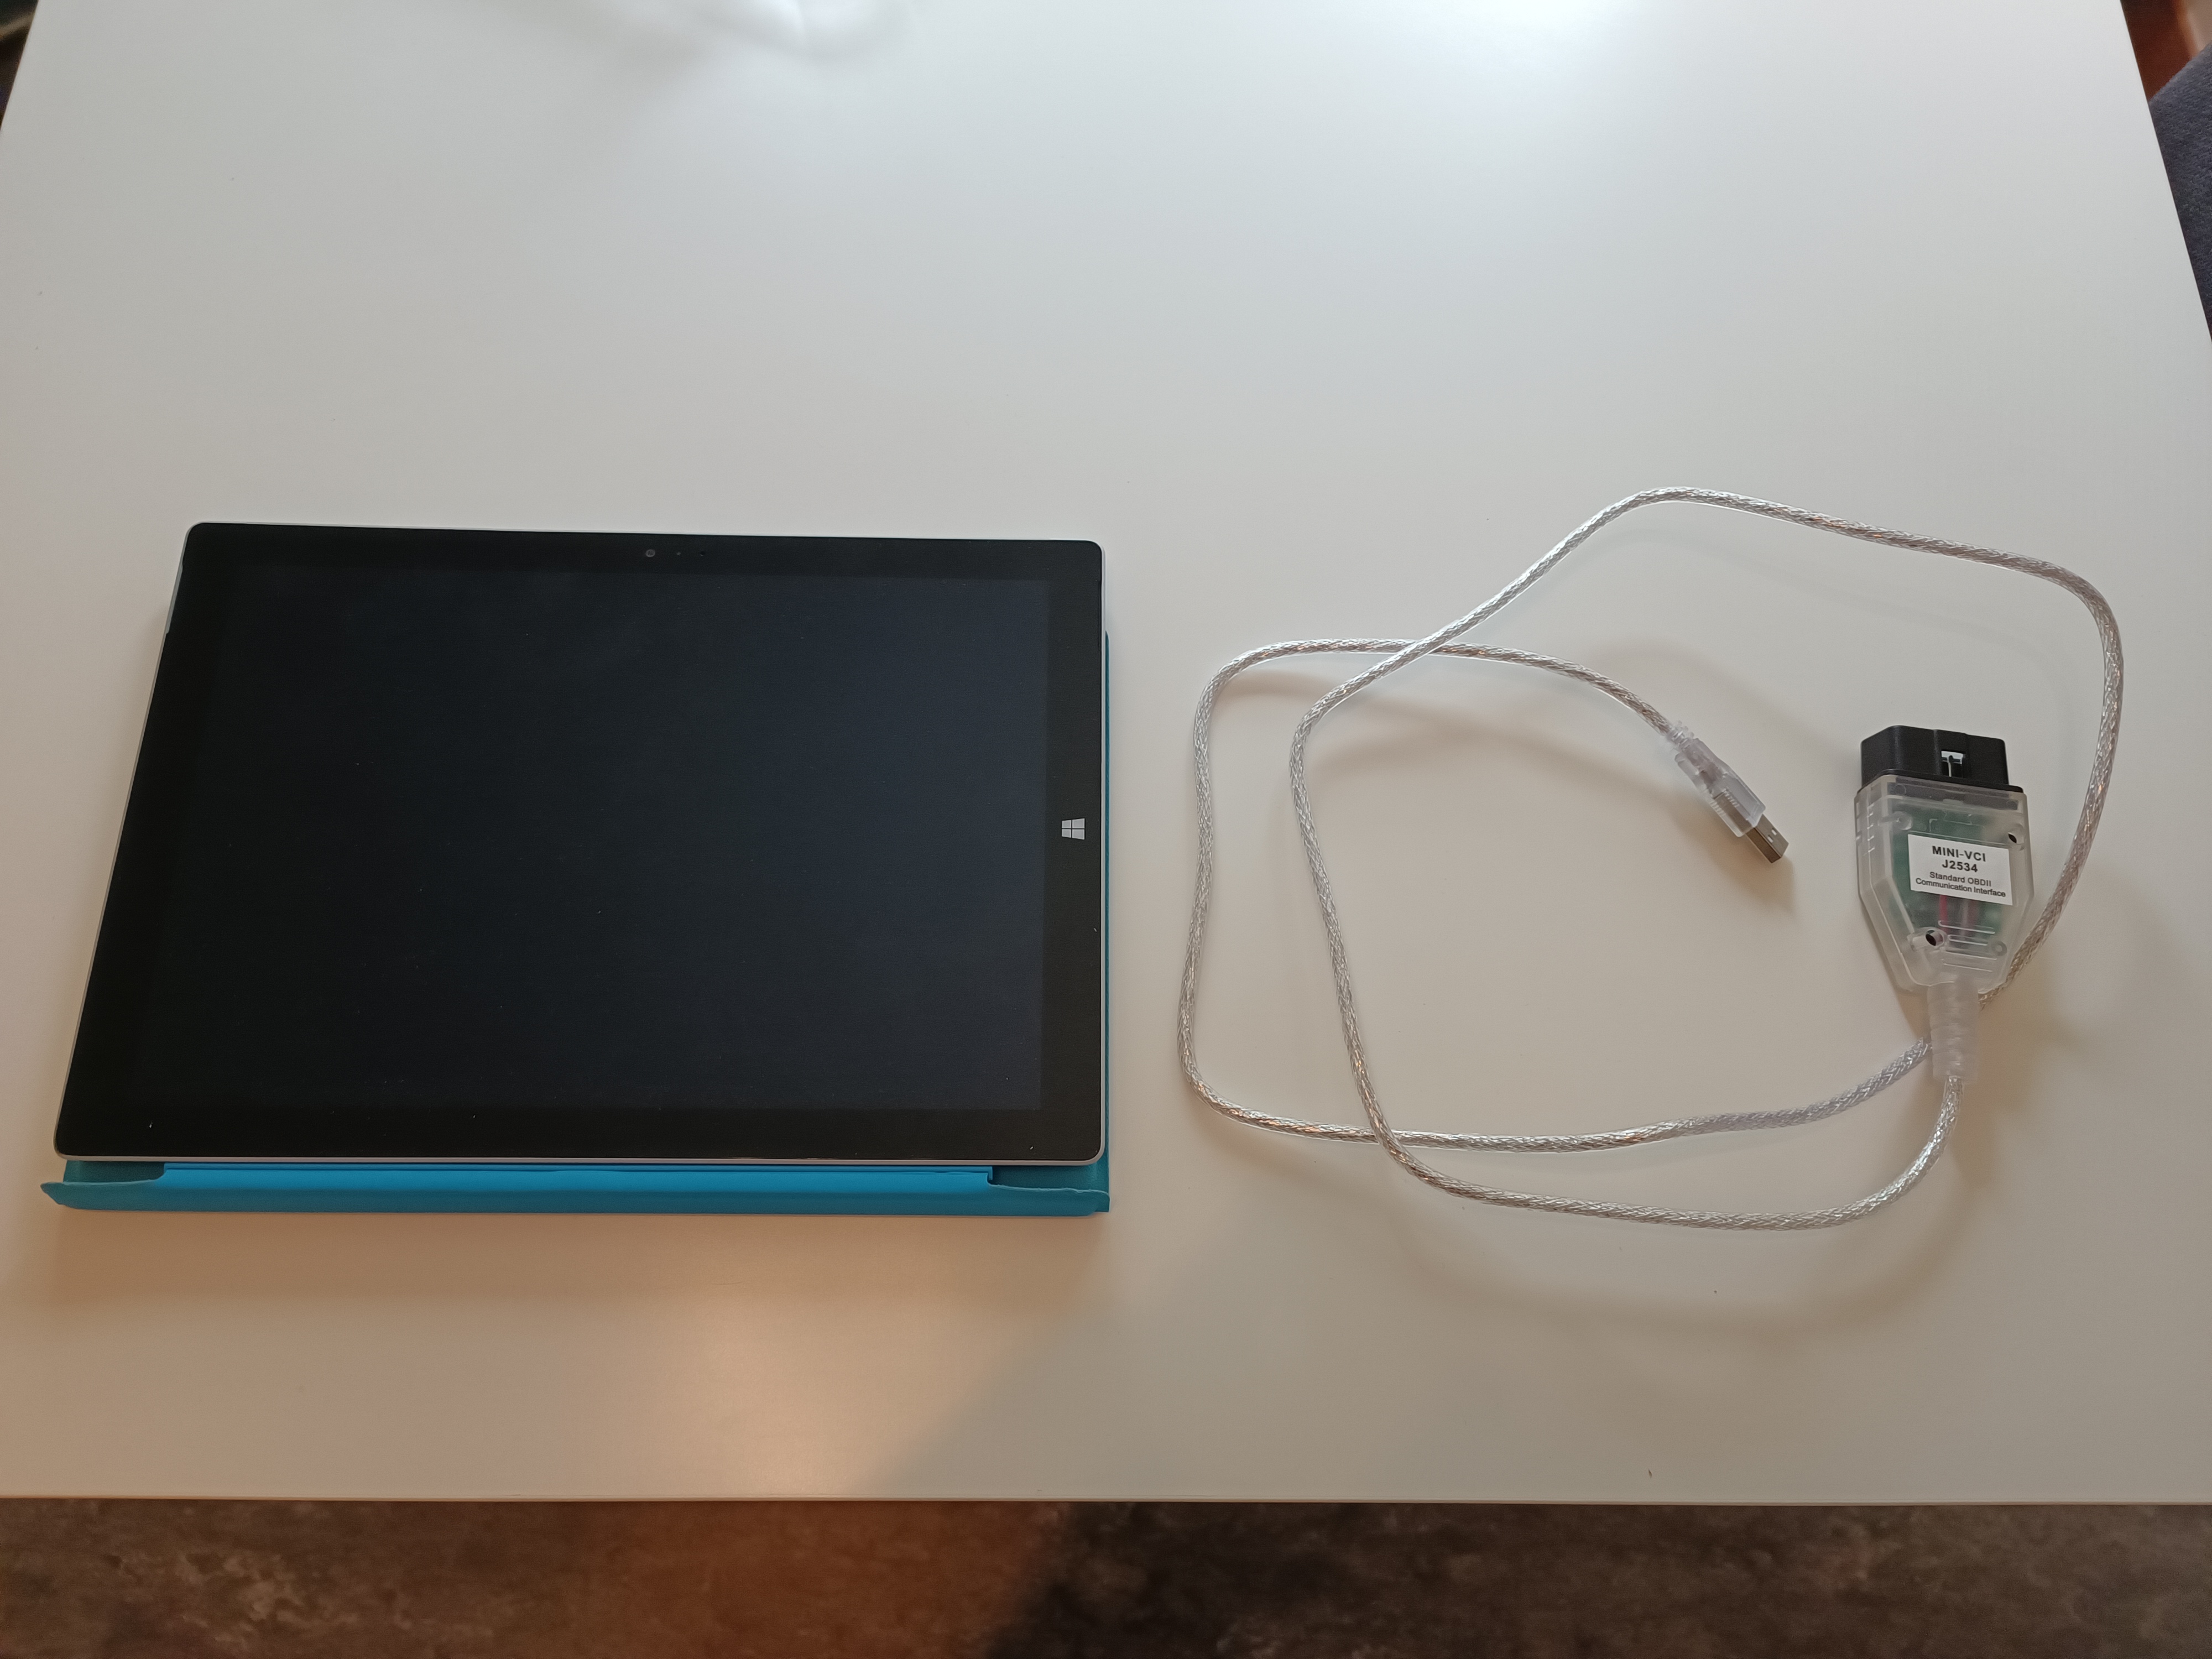
Laptop or similar
I used a Surface Pro 3 Windows 10 64 Bit
What you will need to do:
- Purchase the TPMS Sensors and ensure you own a Mini VCI Cable
- Download the Techstream Software
- When the sensors arrive, make sure you write down the ID of the sensors since this will be necessary in the programming sequence.
ID below:
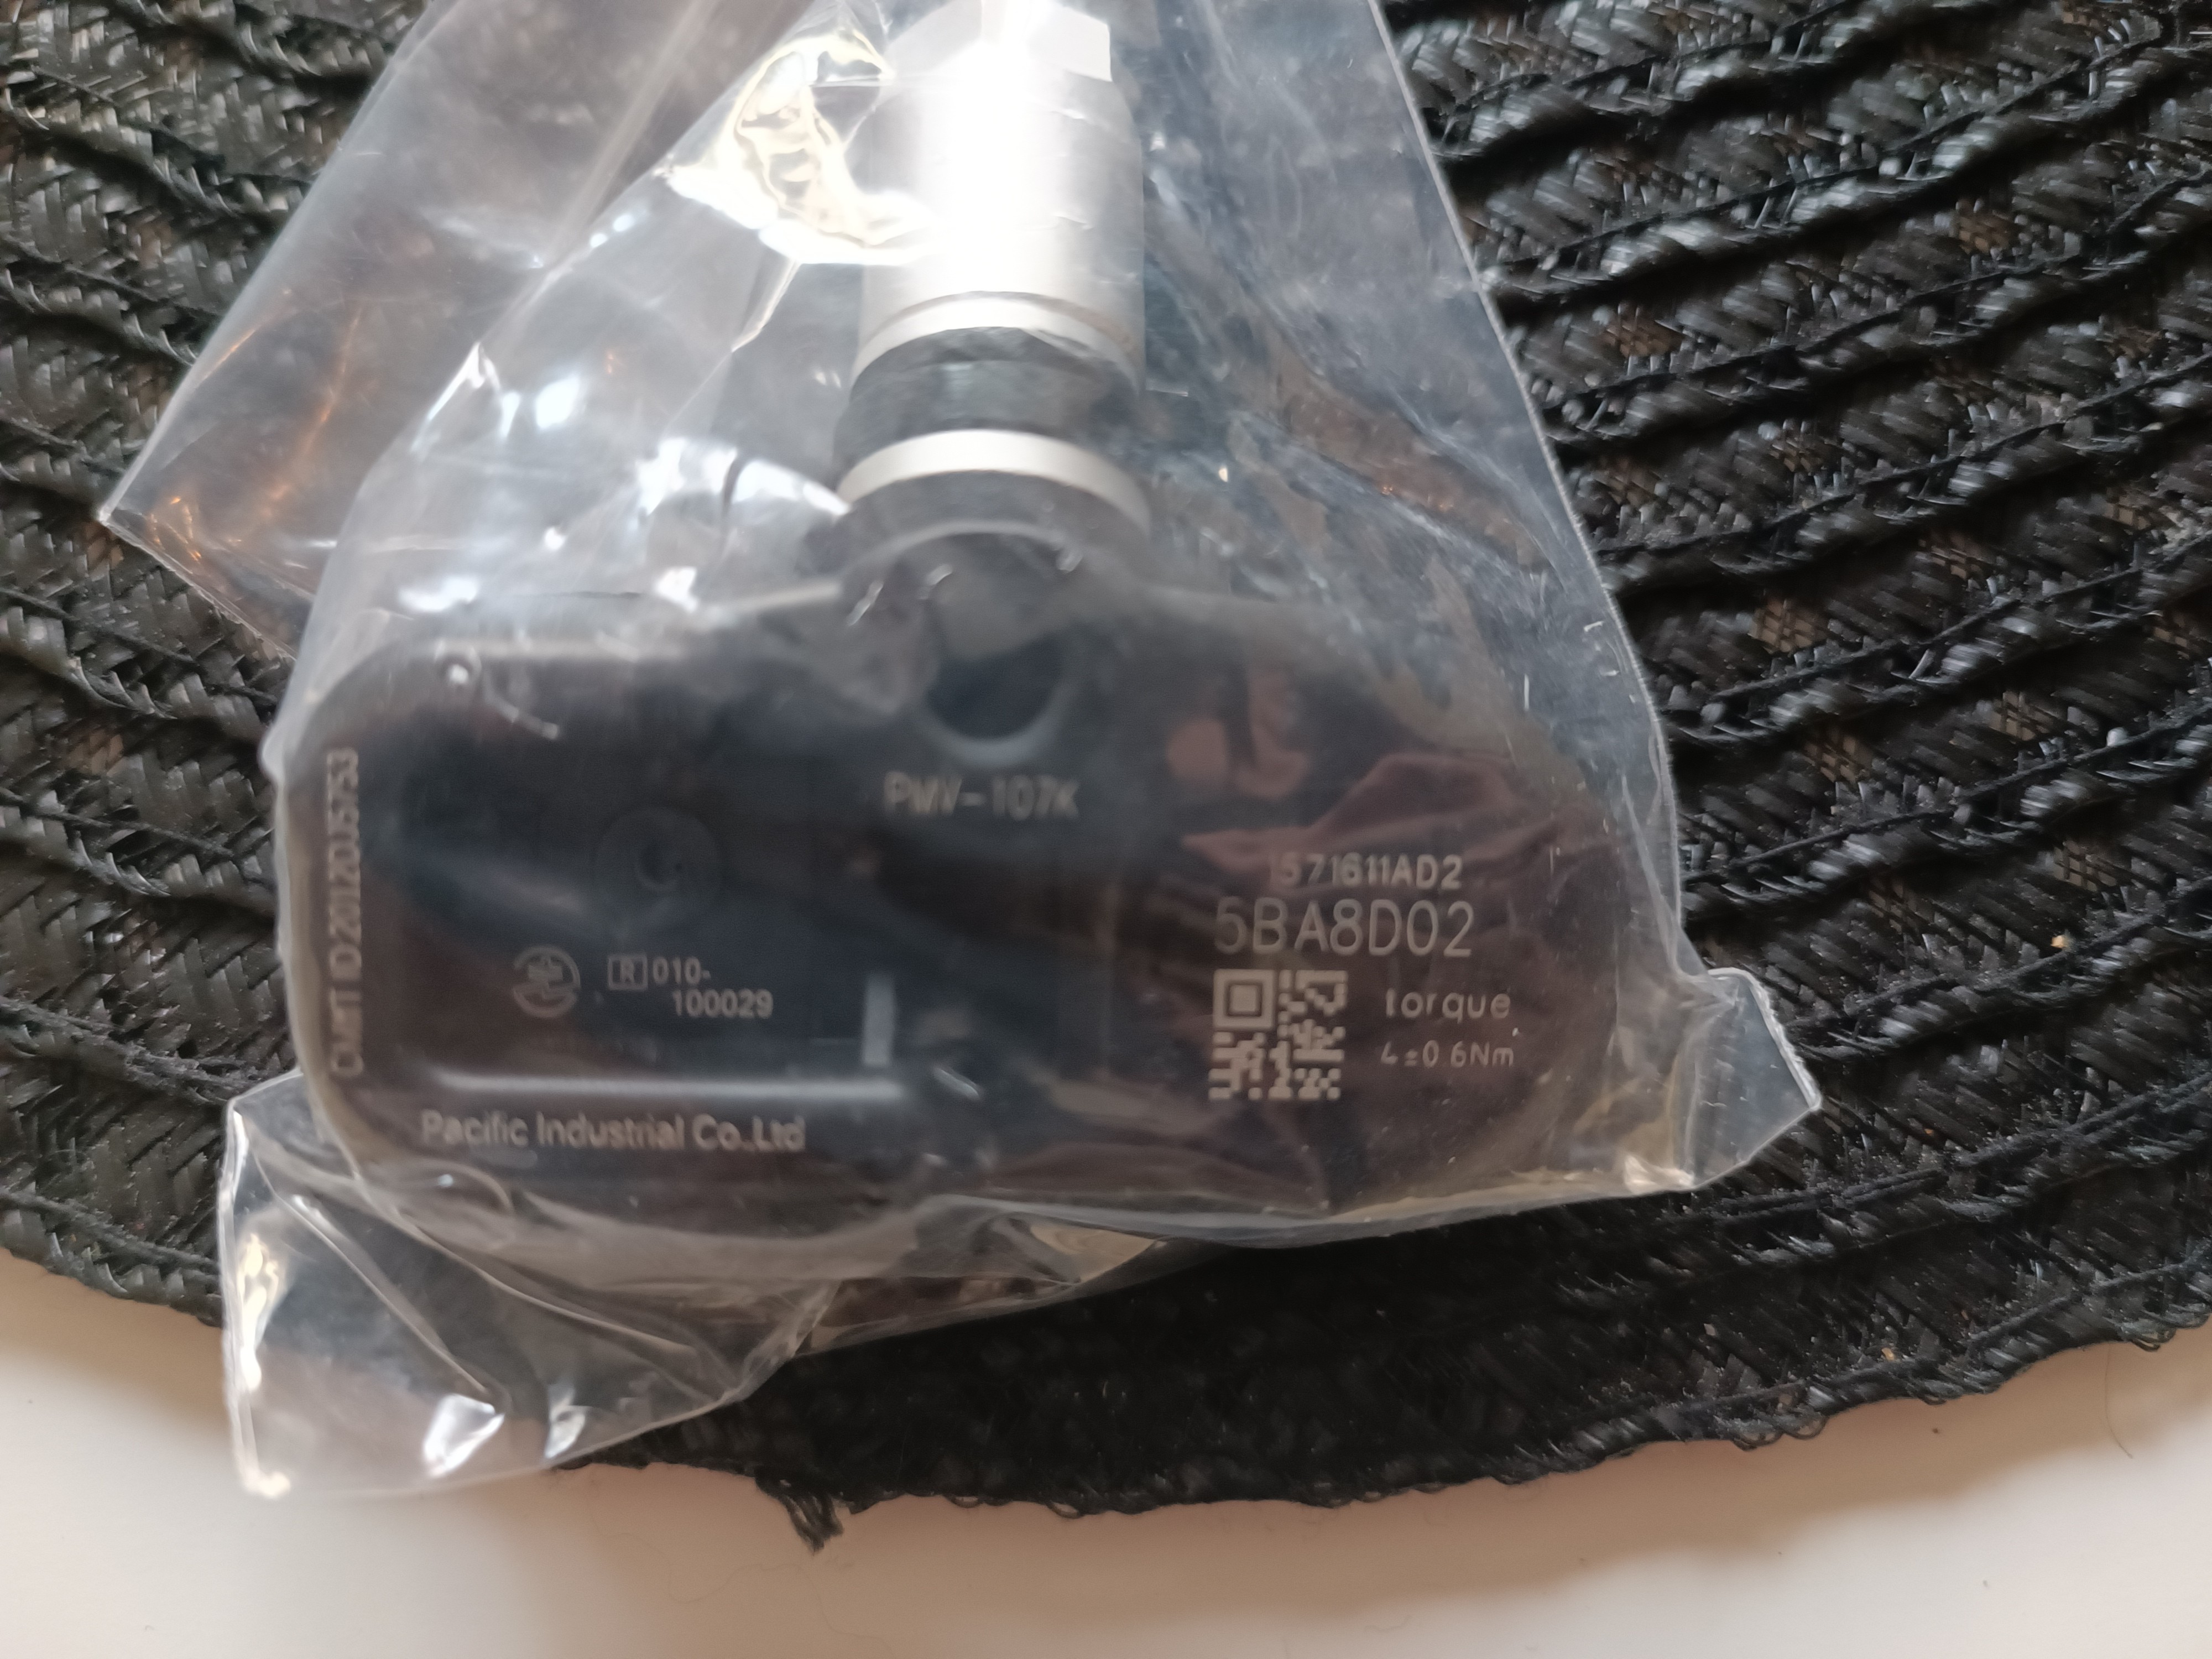 Note: Allowed letters are A-G. This means that the semi-ambiguous O/0 above is a 0 (zero).
- Install the sensors to the wheels. I purchased new tyres from a tyre shop and had them install them for me.
-
Plug in the Mini VCI cable to your portable computer of choice. You will probably receive a prompt communicating that drivers are being installed.
If unsuccessful, you will have to find drivers online for the cable you purchased (USB to Serial Drivers). For me the Windows installed drivers worked fine. Picture of cable and Surface Pro below:
- You will now need to download drivers in order for your cable to properly communicate with the VIM (Vehicle Interface Module). I used Autokent MVCI MultiDriver . Search online and it can be found quite easily. NOTE: There is a high chance of your antivirus (e.g. Windows Defender) incorrectly recognizing this utility as a virus. Make sure you allow it to be both installed and run without the antivirus interfering (at your own risk of course 🙂 )
- Install Techstream, based on the installation instructions from where you downloaded the software
-
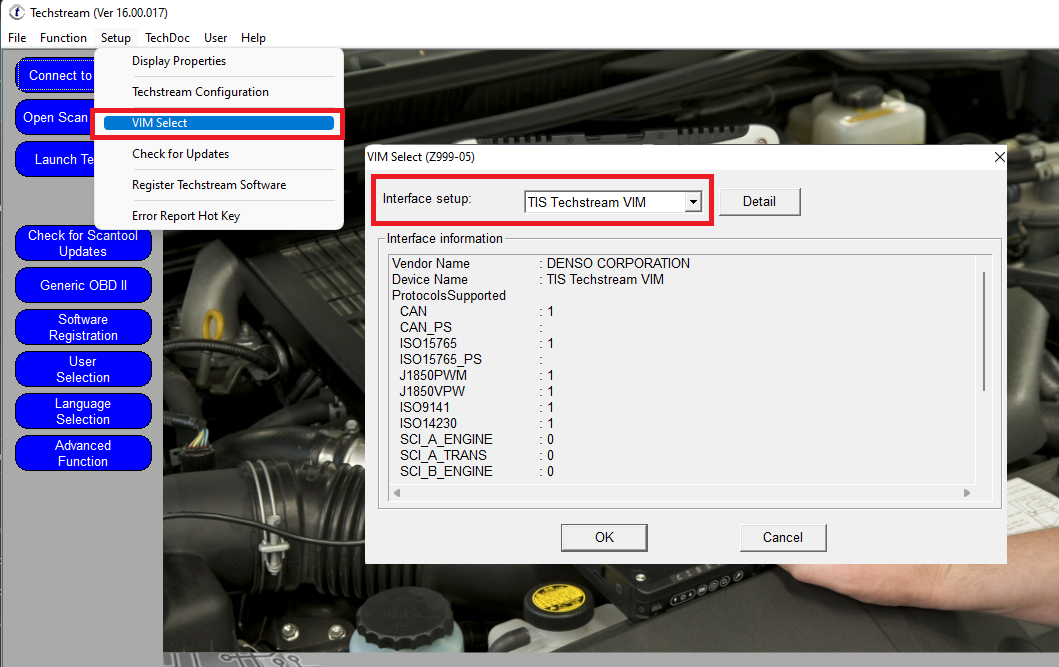
Launch the Techstream application. In the top menu choose "Setup" --> "VIM Select" and change "Interface setup" to the newly installed MVCI Driver (choose the latest version). Picture of default selection below:
- Having the Mini-VCI cable connected to your computer, head out to your vehicle and now plug the other end of the cable into the OBDII-connector. On a GS300 this is located below the steering wheel slightly to the left. Set your vehicle into accessory mode (no need to turn the engine on).
- Press "Connect to Vehicle" in the Techstream application
- Information about your vehicle will after a loading procedure appear. Enter any details not automatically entered and then press next.
- A system selection menu will appear. Choose "Tire Pressure Monitor".
- On the left hand side of the application, choose "Utility". Then choose "ID Registration". Then follow the on-screen instructions.
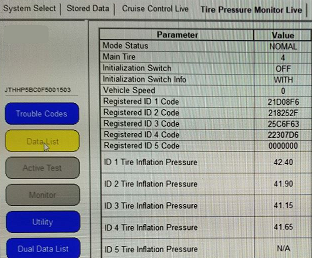
- Once done now choose "Data List" on the left hand side of the application. You should now be able to see entered codes as well as transmitted pressure from the sensors. See below:
- Enjoy not having a Christmas tree of lights in the dashboard signalling an error with the TPMS system. 🙂